

WordPress へようこそ。こちらは最初の投稿です。編集または削除し、コンテンツ作成を始めてください。
ディープラーニングで顔認識
今回は顔認識を紹介します。
一般に顔認識といいますと、2つの文脈に分解ができます。1つ目は、画像から顔を検出する顔検出と呼ばれる分野と、2つ目は検出した顔は誰だったのか?という顔認識の分野です。検出がしたいタスクなのか、認識したいタスクなのかでアプローチは異なってきます。今回は、顔検出、顔認識のどちらも可能なライブラリの紹介をします。
環境:Ubuntu, Python 3.6
今回はこちら https://github.com/ageitgey/face_recognition を使用してみました。
インストール方法は簡単で、pip install だけです。
pip install face_recognition
今回テストする画像
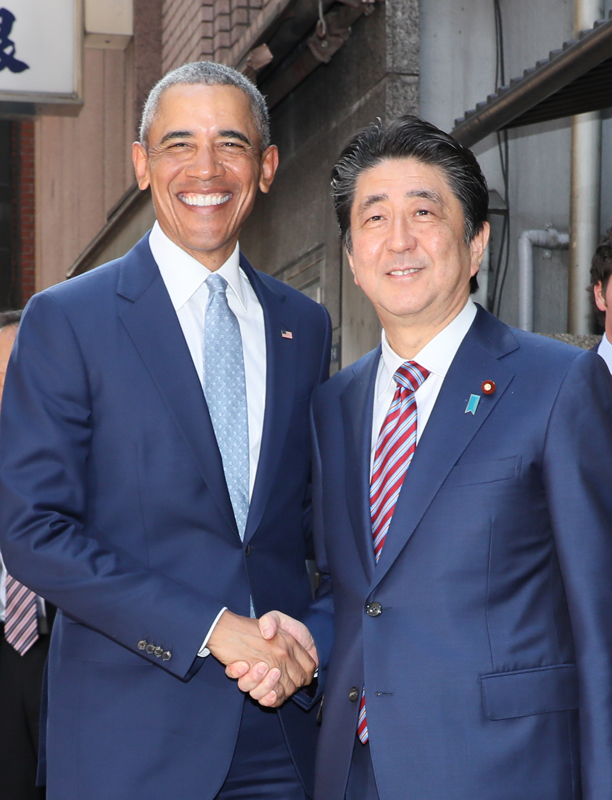
まずは顔検出をしてみます。
実装コードは以下です
import cv2
import face_recognition

image = face_recognition.load_image_file("Shinzo_Barack.jpg")
face_locations = face_recognition.face_locations(image)

for (top, right, bottom, left) in face_locations:
    cv2.rectangle(image, (left, top), (right, bottom), (255, 0, 0), 2)

image = cv2.cvtColor(image, cv2.COLOR_BGR2RGB)
cv2.imwrite("face_bbox.jpg", image)
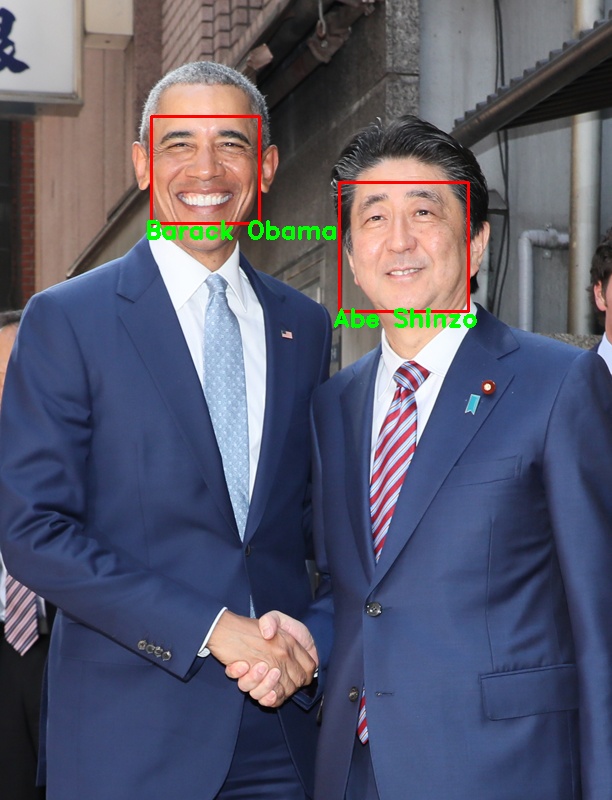
無事に顔を検出することができました
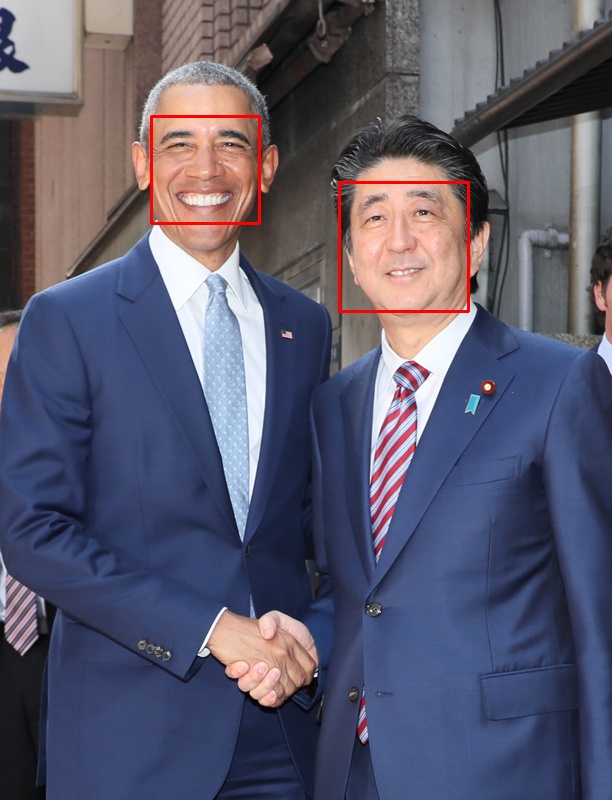
次に、顔認識を行います。
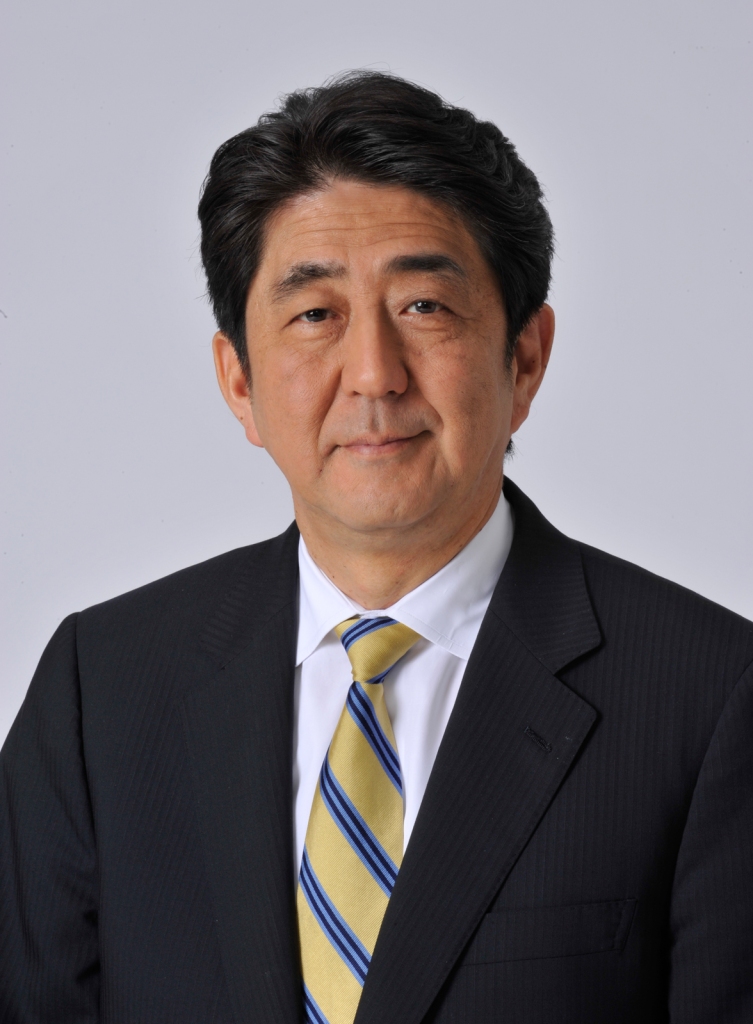
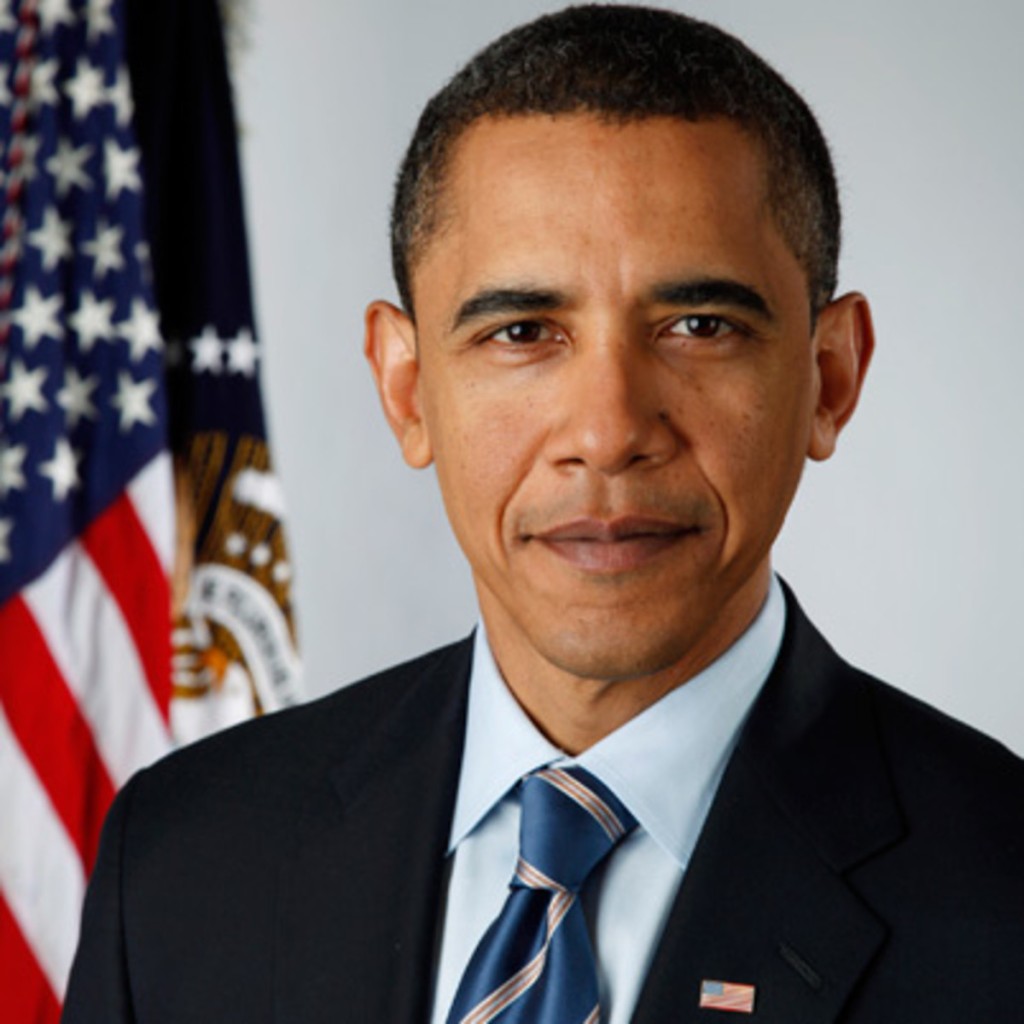
その前に、学習データとして事前にオバマ大統領と安倍首相の教えないといけません。こちらの画像をシステムに事前に配布しました。
準備は整ったので顔検出と顔認識の両方を行います
コードはこちら
import cv2
import face_recognition
import numpy as np

# Load a sample picture and learn how to recognize it.
obama_image = face_recognition.load_image_file("Barack_Obama.jpg")
obama_face_encoding = face_recognition.face_encodings(obama_image)[0]

# Load a second sample picture and learn how to recognize it.
abe_image = face_recognition.load_image_file("Shinzō_Abe.jpg")
abe_face_encoding = face_recognition.face_encodings(abe_image)[0]

# Create arrays of known face encodings and their names
known_face_encodings = [
    obama_face_encoding,
    abe_face_encoding
]
known_face_names = [
    "Barack Obama",
    "Abe Shinzo"
]

image = face_recognition.load_image_file("Shinzo_Barack.jpg")
face_locations = face_recognition.face_locations(image)
face_encodings = face_recognition.face_encodings(image, face_locations)

face_names = []
for face_encoding in face_encodings:
    # See if the face is a match for the known face(s)
    matches = face_recognition.compare_faces(known_face_encodings, face_encoding)
    name = "Unknown"

    # # If a match was found in known_face_encodings, just use the first one.
    # if True in matches:
    #     first_match_index = matches.index(True)
    #     name = known_face_names[first_match_index]

    # Or instead, use the known face with the smallest distance to the new face
    face_distances = face_recognition.face_distance(known_face_encodings, face_encoding)
    best_match_index = np.argmin(face_distances)
    if matches[best_match_index]:
        name = known_face_names[best_match_index]

    face_names.append(name)

for (top, right, bottom, left), name in zip(face_locations, face_names):
    cv2.rectangle(image, (left, top), (right, bottom), (255, 0, 0), 2)
    font = cv2.FONT_HERSHEY_DUPLEX
    cv2.putText(image, name, (left - 6, bottom + 15), font, 0.8, (0, 255, 0), 2)

image = cv2.cvtColor(image, cv2.COLOR_BGR2RGB)
cv2.imwrite("face_recognition.jpg", image)
顔検出と顔認識ができました。
サードパーティのライブラリと組み合わせると動画でも同様のことが可能になります…!
EASTによるテキスト検出の環境手順
テキスト検出はEASTが有名かと思うので今回はEAST: An Efficient and Accurate Scene Text Detector を動かしてみようかと思います。
環境手順
https://github.com/argman/EAST からコードをclone
git clone https://github.com/argman/EAST.git
cd EAST
conda環境を作成
conda create -n east python=3.6依存ライブラリのインストール
pip install -r requirements.txt
pip install opencv-python
pip install Shapely
conda install tensorflow=1.15
下記のエラーが出た場合は `sudo apt-get install libgeos-dev` を実行
Downloading Shapely-1.5.13.tar.gz (176kB)
    100% |████████████████████████████████| 184kB 936kB/s
    Complete output from command python setup.py egg_info:
    Failed `CDLL(libgeos_c.so.1)`
    Failed `CDLL(libgeos_c.so)`
    Traceback (most recent call last):
      File "<string>", line 1, in <module>
      File "/tmp/pip-build-lx_i2wdn/Shapely/setup.py", line 38, in <module>
        from shapely._buildcfg import geos_version_string, geos_version, \
      File "/tmp/pip-build-lx_i2wdn/Shapely/shapely/_buildcfg.py", line 167, in <module>
        fallbacks=['libgeos_c.so.1', 'libgeos_c.so'])
      File "/tmp/pip-build-lx_i2wdn/Shapely/shapely/_buildcfg.py", line 161, in load_dll
        libname, fallbacks or []))
    OSError: Could not find library geos_c or load any of its variants ['libgeos_c.so.1', 'libgeos_c.so']
学習済みモデルをダウンロード https://drive.google.com/open?id=0B3APw5BZJ67ETHNPaU9xUkVoV0U ダウンロード後解凍する
unzip east_icdar2015_resnet_v1_50_rbox.zip 推論を実行する
python eval.py --test_data_path={テキスト検出したい画像のあるディレクトリ} --checkpoint_path={モデルを解凍したディレクトリ} --output_dir={結果を出力したいディレクトリ}例
python eval.py --test_data_path=images/ --checkpoint_path=east_icdar2015_resnet_v1_50_rbox --output_dir=outputs結果が出力されました

自己紹介
はじめまして。KYLA株式会社代表の斎藤です。
1991年生まれ。2014年ERPパッケージベンダーに新卒入社。AI搭載のERPパッケージの設計・開発に従事した後独立。個人事業主として3年の業務経験を経てKYLA株式会社を創業。エンジニアとして6年以上の経験があります。
2017年にAI技術に出会い、あらゆるシーン、あらゆる産業でのAIの利用できる可能性を感じ、「AI革命で人々を幸せに」というビジョンを掲げ、KYLA株式会社を創業しました。
特に、AI技術の真価は機械に「眼」がついたと言われている画像認識だと思っております。すべての単純作業はAIに置き換えることが可能です。特に製造業のありかたはここ数年で飛躍的に変化していくことでしょう。
私自身、AI技術だけではなく、最新のSPAのフロントエンド、Python/Ruby/Javaなどのサーバーサイド、データ基盤などのインフラ構築なども経験豊富です。
「AIで何ができるの?」といった些細な質問でも何でもご相談ください。